Trailer Inspection Report: What’s in It and Examples
Before you drive off with a load of freight, you must make sure you're roadworthy, right?
Ready to transform your supply chain?

This is why trailer inspection reports are one of those daily practices for drivers. Eat, sleep, inspect the rig, hook some loads, make that money. But what do these reports entail?
In this post, we’ll talk about the importance of trailer inspections, provide a sample checklist you can use in writing your report, and discuss how digitizing this process may be the way to go.
The Importance of Trailer Inspections
The trailer inspection itself isn’t a complicated or lengthy process. In fact, you might argue that completing the trailer inspection report takes longer than the inspection itself.
That said, it’s important. Section 396.11 of the Federal Motor Carrier Safety Administration (FMCSA) governing rules covers trailer inspections. It mandates that both the power unit and trailer must be inspected before they are operated in tandem. In short, any time a driver picks up a trailer, they must inspect it. In addition, the FMCSA also requires equipment to undergo an annual inspection. It’s worth noting that if a driver is pulled over for a road check or DOT inspection, they’ll look at everything on this inspection list.
A Sample Checklist
As such, here’s a simple checklist you can use to complete a trailer inspection report.
- Sides of trailer
- Placards
- Lights, lenses, decals, and reflectors
- Landing gear
- Cross members
- Hoses and wires
- Sliding tandem
- Suspension
- Brakes
- Wheels
- Mud flaps
- Rear of trailer
- Kingpin
Ready to go? OK, grab a pair of gloves—a good inspection will get our hands dirty!
Sides of Trailer
Start your trailer inspection with a look at the sides of the trailer. You want to check and make sure there aren’t any holes in the sidewalls because you never know when a fork truck can poke through a wall.
Placards
Next, you want to make sure your placards are in the correct position. Unless you’re carrying hazmat material, you need to make sure your placards are blank and not showing anything when your trailer is empty. On the other hand, make sure your placards are correct when you are carrying hazmat.
Lights, Lenses, Decals, and Reflectors
You’ll want to check your lights, but note that this also includes all lenses, decals, and reflectors. This inspection is easier to accomplish when it’s darker out, sure, but make sure nothing is damaged or loose. You’re looking for any cracks that may render a light inoperable. Check your ABS warning light. For the decals, we want those to be in good shape without cuts, tears, or shredding.
Also, make sure nothing is dirty or caked in mud! Double-check that your reflectors are the correct color. You’re not going to refuse a load over this, but note it on your trailer inspection report.
Landing Gear
When checking this part, you want to first see that it is properly stowed. Grab the handle, making sure it is functional and turns both up and down. I once had a driver tell me, “If your landing gear is jammed, you’re jammed.”
Give your bracing and crossbars a look. Do you see anything bent, loose, or missing? Next, inspect the feet. Look for damage, bends, or breaks. Again, even if it isn’t to the point where it inhibits operation, this is something worth noting in a trailer inspection report.
Cross Members
After that, we want to take a look at the cross members under the trailer. We want to inspect each one up and down. Make sure none are cracked, damaged, or loose.
Hoses and Wires
When it comes to the rear-wheel unit, the first things you want to check are your hoses and wires. Then make sure your air hoses and ABS wiring aren’t frayed, leaking, or otherwise damaged. That said, make sure it’s all properly suspended with no chance that it can rub the ground.
Sliding Tandem
When you get to the sliding tandem, make sure the handles are in the locked position. Verify that none of the trailer framework is damaged, dented, or bent. That can inhibit how the tandem slides and force a driver to use an incorrect position placement. Take note that all pins are in the locked position, then check both axles and mounts for any damage or cracks.
Suspension
Start with each shock mount. Check uppers and lowers, and make sure nothing is loose or cracked. Make sure there is no hydraulic fluid visible, which indicates a leak. Next, look at all the airbags, pushrods, and slack adjusters. Then check that there is no damage and that the airbags are inflated. Note that slack adjusters shouldn’t have more than one inch of play. Look to see that everything is properly mounted and that bolts are tightened. Note any inconsistencies, cuts, leaks, or damage.
Brakes
Start by checking all your wires and hoses. Again, look for any damage, leaks, or connection issues. Look at the brake chamber and make note of any dents, damage, or leaks. Make sure all your clamps and bolts are tight and secure. Then look at your brake pads and drums. Check to see whether you have at least a quarter inch on the brake pads. Take note of any oil or grease or signs of excessive heat.
Wheels
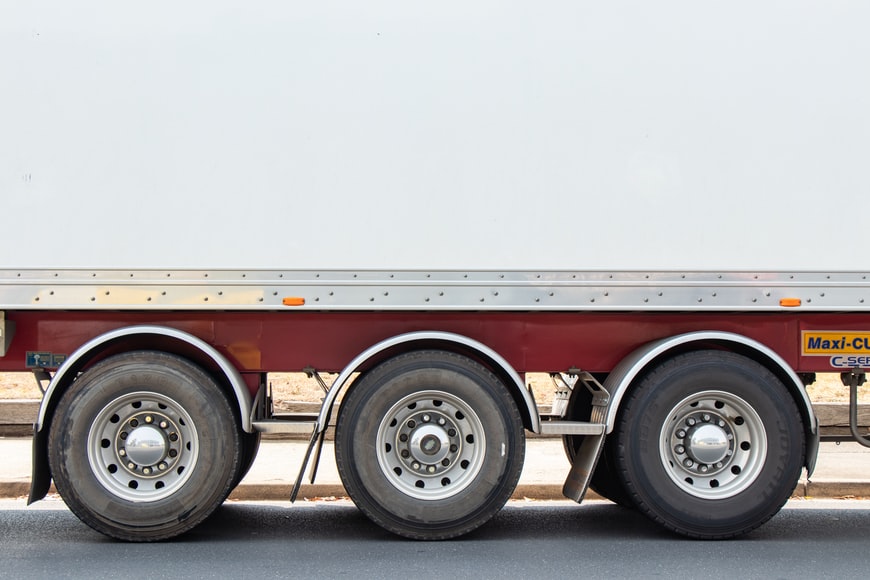
The first thing to check is that you have three inches of clearance between each wheel, and that they’re properly seated to the rims. Look for and clear out any excess debris. Then check all your sidewalls, looking for wear, cuts, and threads. Inspect your rims, nuts, and axle seals for any damage, dents, or excess oil.
Next, check your tire treads. You want to confirm you have at least 1/16″ tread depth and no uneven wear, puncture wounds, or debris lodged in the tread. But also note whether all tires match or at least are the same size. Check that each tire is properly inflated to the correct PSI. If you use an automatic tire pressure gauge, confirm it’s in good working order. Lastly, make sure your spare tire is properly chained and secure.
Mud Flaps
Are your mud flaps good? Make sure they’re mounted correctly, not cracked, loose, or rubbing the ground. Also, do they all match? And finally, do they feature Yosemite Sam?
Rear of Trailer
Take a general account of the rear doors. Is anything damaged or loose? Are the handles in the latched and locked position? Then, again, take account of the rear lights and decals. Check your license plate for proper mounting and illumination.
Kingpin
I would recommend checking the kingpin. No one wants to drop a load. The best way to make sure the lock jaws are secure around the kingpin is to get between the rear wheels and visually check. I know it can be rough getting under there, but it gives you peace of mind.
Apps That Streamline the Trailer Inspection Reporting Process Are Here
All told, once you know what to look for, a trailer inspection goes quickly. The same is true for completing your reports. It’s worth noting that logistics software companies like Vector have entered the market to streamline drivers’ workflows with easy-to-use apps.
Vector’s app creates a digital, online copy of your trailer inspection reports. Vector synchronizes trailer inspection reports with the rest of a driver’s load documents. No more paperwork. Just fill it out on your phone and press Send. Vector’s toolkit of logistics software options helps simplify and streamline workflows. Ultimately, like with trailer inspection reports, the key is to keep things simple and consistent.
Closing Thoughts: Avoid Shutdown
The FMCSA shut down an Alabama trucking company for “failing to have a systematic inspection, repair and maintenance program for vehicles.” Among other things, that failure extends to inspection record maintenance. If only there was an easier way to stay on top of things! Now we know there is.
At the end of the day, reports for trailer inspections improve overall safety. That being said, it doesn’t need to be a long process. Add a tool like Vector’s app to smooth out your day.
So stay safe, avoid fines, and keep trucking!
This post was written by Brian Deines. Brian believes that every day is a referendum on a brand’s relevance, and he’s excited to bring that kind of thinking to the world of modern manufacturing and logistics. He deploys a full-stack of business development, sales, and marketing tools built through years of work in the logistics, packaging, and tier-1 part supply industries serving a customer base comprised of Fortune 1000 OEMs.
Continue reading
Ready to transform your supply chain?
Increase efficiency and productivity. Say goodbye to delays, handwriting errors, and time-intensive manual data entry.


